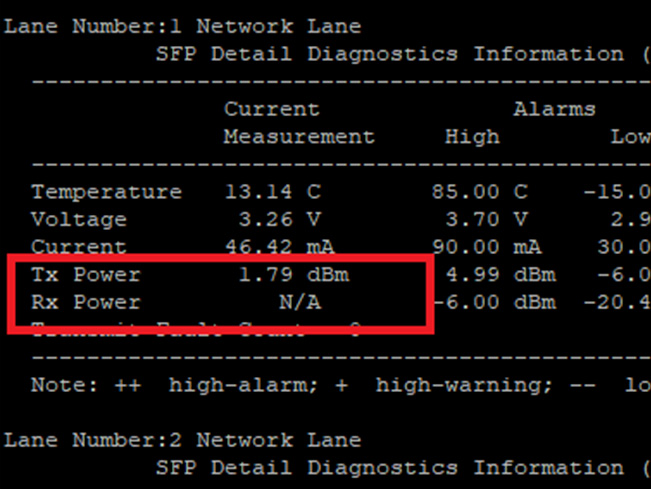
Network Transceiver Maintenance

Inspection and Cleaning Procedures for Fiber-Optic Connections

The reliability and effectiveness of optical transceivers and fiber optic cables depend not only on their quality but also on how well they are maintained. Regular inspection and cleaning of these components are crucial for ensuring high performance levels of the whole network system. Even the tiniest speck of dust can significantly disrupt signal transmission and cause reduced data quality, increased latency, and connectivity problems. Regular and proper cleaning of fiber optic cables and transceivers ensures long-term reliability and performance and prevents costly repairs, downtime, and network disruptions.

Signs an optical transceiver may be contaminated

Performance Monitoring

Signs of contamination usually exhibit themselves in the form of performance degradation

Signal Loss​
If you notice a loss of signal strength, this could be a sign of contamination. This can be monitored by viewing the Rx Power (Receiving Power) through the system.
Error Rates
Increased error counts, such as input errors, CRC errors, or packet loss can also indicate possible contamination or other issues.
Link Flapping
If the connection flaps between connected and disconnected, this is also a sign of possible contamination.

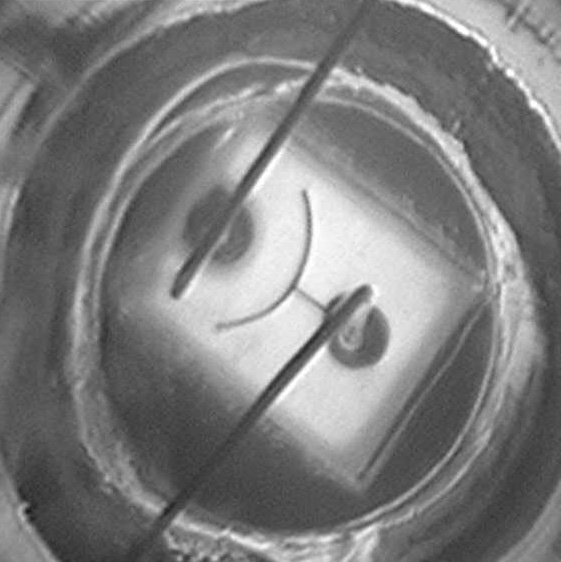
Example picture features an RX Lens too contaminated to pass data.

Transceiver Inspection & Diagnosis

Optical transceivers  require regular inspection and cleaning to ensure optimal performance. The cleanliness of fiber optic connections is crucial because even the smallest particle of dust can cause problems for your signal transmission.

Contaminated Transceiver Lens

Illustration of a transceiver with contaminated optical lens

Clean Transceiver Lens

Illustration of a transceiver with clean functioning optical lens
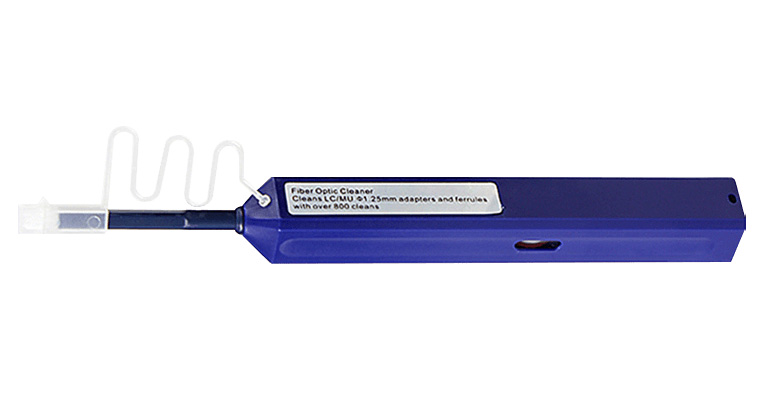
Why is maintenance important?

Even if a transceiver and fiber cable were cleaned and properly inspected upon original installation, there are still ways in which the connectors can acquire contamination over time, even if the cable has never been removed. Here are some potential causes:

Airflow

In data centers or cabinets with active cooling, the airflow intended to cool equipment can inadvertently introduce or move around dust and particles, leading to contamination.

Wear and Tear

Over time, connectors may degrade or wear out due to constant thermal cycling, causing them to release minute particles, which can contaminate the end-face.

Condensation

If there are temperature fluctuations in the environment where the connectors are located, condensation can form on the connector end-face, leading to potential contamination.

Enclosures

If the connectors are placed within an enclosure or patch panel, connections within the same enclosure can introduce contaminants every time they are accessed, plugged, or unplugged.

Airborne Contaminants

Dust and other particles in the air find their way into even secure environments. Depending on the cleanliness of the environment, small amounts of dust or other airborne particles can settle on exposed connectors.

Microscopic Particles

Not all contaminants are easily visible to the naked eye. Minute particles from the surrounding environment can settle on connectors. These might have been missed during the original inspection or could have been introduced later.

Degradation of Materials

Over time, the materials used in the connectors, or nearby components, might degrade, releasing tiny particles that can contaminate the fiber optic end-face.

Diagnosing Transceiver Contamination

Visual Inspection

  • Microscope Examination
    Use an inspection microscope, ideally with at least 200x or 400x magnification, to inspect the end-face of the connector. This will allow you to see contamination like dust, dirt, oil, or other debris.
  • Connector Health
    Check the physical condition of the connectors. Visible wear, cracks, or damage can be sites of contamination.

Physical Environment Monitoring

  • Environment Examination
    If the environment where the transceiver operates has recently become dirtier or dustier, there is an increased likelihood of contamination. Keeping tabs on environmental changes can give clues about potential contamination sources.

Optic Baseline Monitoring

  • Compare Against Good Transceiver
    If you suspect contamination, and the visual inspection or tools don't provide a clear answer, try swapping the suspect transceiver with a known good one. If the issues resolve after the swap, it is possible that the original transceiver was the problem.

How To Clean a Transceiver

Gather Cleaning Supplies:
• Lint-free cleaning swabs or sticks, specifically designed for fiber optics.
• Non-abrasive cleaner (air duster)
Dry Cleaning (Stay away from alcohol-based cleaning sticks)
• Use a non-abrasive cleaner (air duster) to remove any dirt or debris.
• Use a dry, lint-free cleaning swab.
• Insert the swab into the transceiver's receptacle.
• Rotate the swab gently for a few turns and then remove.
• Discard the swab after one use.
Inspect After Cleaning
After cleaning, it's a good practice to inspect the connector end-face using a fiber inspection microscope. This ensures that the cleaning process was successful and that there's no residue or other contaminants left behind.
Safety Precautions
• When working with optical modules, make sure you're in an area equipped for ESD (electro-static discharge) protection and follow all necessary safety measures.
• Before handling any module, confirm that it's powered down and treat each module delicately.
• Only use Clean Dry Air (CDA) or a trusted source of canned compressed air.
• While using compressed air, keep the can in a vertical position. Angling it might cause unwanted liquids to be discharged with the air.
Protective Caps
After cleaning, if the transceiver will not be used immediately, ensure you place a protective cap over the connector to prevent future contamination.
Regular Cleaning and Inspection
Your transceivers can significantly extend their lifespan and ensure consistent and reliable performance. Proper care and handling are essential, given the sensitive nature of optical connections.

General Guide For When to Clean

  • Installation
    Transceivers and fiber cables should be inspected at the time they are installed. The installation inspection helps ensure there is no contamination present.
  • After Installation
    After installation, the transceivers and cables should be inspected to ensure they were not contaminated during the installation process.
  • Regular Inspections
    Following installation, regular inspections are key. The specific timeline for these inspections can depend on the operating environment. For instance, if the cables are exposed to harsh environmental conditions (e.g., dust, heat, humidity), more frequent inspections may be necessary.
  • Prior to Reconnecting
    If a cable has been disconnected for any reason, the transceiver and cable should both be inspected and cleaned before it is reconnected.
  • Scheduled Maintenance
    As a part of scheduled maintenance, fiber optic cables should be inspected and cleaned. This is often done annually, but the frequency may be adjusted based on the environment and how critical the network is to operations.

Transceiver Maintenance Products

Pushpen1
GT-LCS-PENFC
LC/MU Simplex Click Pen Fiber Cleaner (800+ Cleans)

Designed for cleaning LC and MU type connectors, this fiber cleaner can easily remove dirt, dust, oil and grease from an optical fiber adaptor. With the ability to each into the entire area within the connector, it makes cleaning of the ferrule endface a simple task with the push of a button.
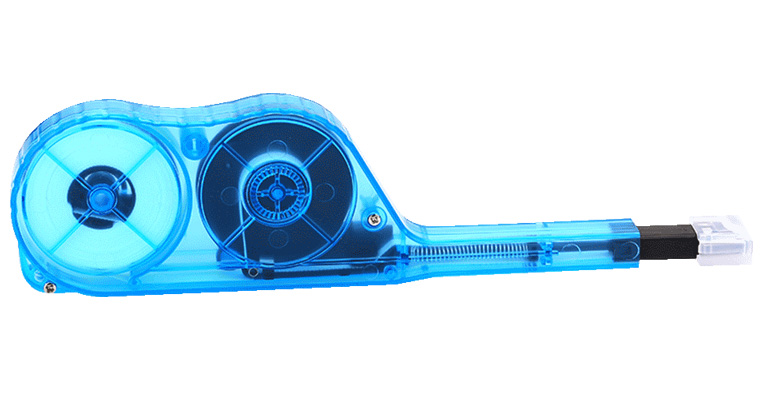
For Fiber Connectors (LC/MU):

  • 1
    Remove the top of outer cap of LC/MU Simplex Cleaner (with attachment still on cleaner)
  • 2
    Align connector to fit into cleaner
  • 3
    Press cleaner until click is heard, then release
  • 4
    Repeat for each fiber cable connection needed

For Transceiver / Fiber Patch Connection (LC/MU)

  • 1
    Fully remove outer cap of LC/MU Simplex Cleaner
  • 2
    Press cleaner until click is heard, then release
  • 3
    Repeat as needed per LC Transceiver / Fiber Patch connection
pushpen2
GT-MPO-PENFC
MTP/MPO Click Pen Fiber Cleaner (500+ Cleans)

This push-type cleaner is specifically designed for the cleaning of ferrule end-faces in MTP/MPO adapters. With the ability to clean all 8/12/24 fibers simultaneously it is a time and cost efficient tool for the maintenance of fiber cables. This cleaner can clean both exposed jumper ends as well as connectors embedded in the adapter.

For Fiber Connectors (MTP/MPO)

  • 1
    Keep attachment on device
  • 2
    Align connector to fit into cleaner
  • 3
    Press cleaner until click is heard, then release
  • 4
    Repeat for each fiber cable connection needed

For Transceiver / Fiber Patch Connection (MTP/MPO)

  • 1
    Fully remove outer cap of MTP/MPO fiber cleaner
  • 2
    Press cleaner until click is heard, then release
  • 3
    Repeat as needed per MTP/MPO transceiver / Fiber Patch connection